
Pita bread is a staple in Mediterranean and Middle East cuisine. You will find different variations of it in every country, with pockets or pocketless, thick or thin, big or small. In most cases, it has a soft and fluffy interior and a slightly chewy exterior.
Here, I’m sharing with you my recipe for making homemade Greek pita bread, the flatbread pita that we use in Greece for souvlaki wraps and meze platters. These homemade pita breads are very easy to prepare and soft, and while you are waiting for your dough to rise you can prepare some tzatziki sauce and pork or chicken skewers to fill them in, like my pork skewers. You could also cut the pita bread in quarters and dip it in tzatziki sauce or tyrokafteri, the way my toddler likes them!
Jump to:
Why you should try my recipe
- Easy to follow recipe with only 5 ingredients.
- No need for kneading, just mixing the flour with the wet ingredients.
- No need for a rolling pin, the dough is playable and can be flatten with fingers.
- Pita bread is soft and easy to fold, you can use it as dipper or wrap.
- Freezable, just warm them up in a pan for a minute after thawed.
Ingredients & How-to
This Greek pita bread recipe has only 5 ingredients that you usually have in your pantry, especially if you like making your own bread: yeast, water, salt, sugar and flour. For full quantities check the recipe down below.

01. To start, I need to activate the yeast using the right temperature for the water. You will need lukewarm water, that means not too hot but warmer than your body temperature when you dip your hand in. To achieve this I use half a cup of boiling water and one cup of cold tap water. If you have a thermometer then aim for a temperature between 105-110F or around 40 celsius.
Then, I add the dry yeast and sugar to the water and give it a bit of a stir. I cover with some cling film and let it activate for 5-10 minutes. If your yeast is good and hasn’t expired, you will see some foam and bubbles at the top of the water.

02. The next step is to add the salt to the flour and give it a bit of a stir. Salt can kill the yeast so we want it mixed in with the flour to prevent immediate contact. Then, with one hand I add the flour little by little to the yeast mixture while I use my other hand to incorporate all ingredients. After adding all the flour in, you will have a dough with a sticky texture and very playable.
03. I now move on to my wooden board to form my dough. I add a handful of flour to the wooden surface and place my dough on top. There is no need for kneading, just turn the dough around until it absorbs all the flour from the surface and it’s not sticky anymore.


04. Now it’s time for the dough to rest and rise. I add a couple of tablespoons of olive oil to a bowl and place the dough on top. I cover it with some cling film or a tea towel and leave it for an hour to rest until it doubles in size. Make sure it’s placed somewhere warm enough for the yeast to do all the work.
05. After about an hour, you will see that the dough has doubled and it’s very light and cloudy. I put a little bit of oil in my hands and move the dough on a wooden surface.


06. I just fold the dough a few times to remove the air and form it into a long roll. Then I cut it into 8 equal pieces using a knife or a dough scraper and set them aside.


Mamazilla's Product Recommendations
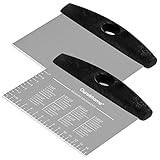
This one is one of my favorite kitchen tools. I use it for dough and baking but also when I want to move my chopped vegetables from the chopping board to the pot. Love it!
Buy On Amazon07. I place a nonstick frying pan over medium heat and start forming the first pita bread. I take one dough piece and roughly form a ball with my palm. Then I just press it with my fingers until it flattens out into a round shape. I place the pita on the heated pan and let it cook for a couple of minutes. You can prick the pita with a fork if it starts forming any bubbles at the top. Then flip it over and cook for another minute.


Mamazilla's Product Recommendations
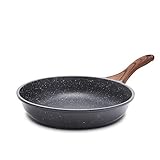
I love these swiss granite pans! They are nonstick, great for frying or pancakes and crepes and most of all, SGS approved & PFOA free.
Buy On AmazonServing suggestions
You could use the pita bread for dipping into sauces like tzatziki dip or beetroot & yogurt dip. You could also use it as a wrap and fill it in with some veggies and meat. Why not make a greek souvlaki wrap by adding some tzatziki, pork skewer, chopped tomatoes and onions. So versatile!

Storage
If you have any leftover Greek pita breads, you can store them in an airtight container in the fridge for 2-3 days and just warm them up in a pan for a minute when you want to eat them. Pita bread is also freezable for up to 2-3 months. Just thaw them overnight and warm them up in a heated pan for 1-2 minutes.
FAQ
Yes you can, one hour is the minimum. You could leave it for 3-4 hours just make sure you remove all the air pockets after.
You can use plain flour or bread flour, whatever you have in your pantry. Bread flour has more protein and will rise better but plain flour will also work well.
You can use a teaspoon of honey or rice malt syrup instead of sugar or not use any sweetener at all. If you don't use any sweetener the yeast will not have bubbles after resting for 10 minutes in lukewarm water but it will still work fine if you are sure it hasn't expired.
These are great for babies from 6 months and toddlers if you cut them in triangle slices. They can be used as dippers in yogurt or a sauce or a runny egg. You can skip the sugar and adjust the salt to your liking.
Unfortunately, I haven't tried this so I can't tell. If you do try it though leave me a comment below cause I would love to know how it went.
Although they look very similar, there are some key differences between naan and pita bread. Naan bread has eggs and yogurt as ingredients whereas pita bread has just water, flour and yeast. Naan bread can be plain or with a filling like coconut and raisins. On the other hand pita bread can have pockets or be flat and doesn't have any filling on its own. Pita bread is used as a wrap for meat or eaten on its own with sauces and dips.
Greek pita bread is a round flatbread without any pockets and used most of the times as wrap for meat and tzatziki sauce, the famous Greek souvlaki. On the other hand, the regular pita bread found in most eastern countries, has an oval shape and comes with a pocket to fill in with veggies or meat and sauces.
If you tried my Greek Pita Bread - Pocketless Flatbread or any other recipe on my website, please leave a 🌟 star rating and let me know how it went in the 📝 comments below. I love hearing from you!
Recipe
Greek Pita Bread - Pocketless Flatbread
The Greek pita bread is a pocketless flatbread that is used for the popular souvlaki wrap, the Greek street food. In this pita bread recipe, you need only a handful of ingredients and no kneading or a rolling pin. It makes about 8 pitas that can be used for a souvlaki wrap or for dipping in a sauce like tzatziki or for a meze platter. Enjoy!
8 pitas
1 hour 30 minutes
Ingredients
- 3 ½ cups (500gr) flour (plain or bread flour)
- 1 ½ cup lukewarm water
- 1 teaspoon of sugar
- 2 ¼ teaspoons of (1 sachet) dry yeast
- 1 teaspoon of salt
Equipment
- dough scraper (paid link)
- nonstick frying pan (paid link)
Instructions
- Add the lukewarm water to a bowl with the sugar and dry yeast.
- Cover with cling film and let it rest for 5-10 minutes until it forms foam and bubbles on top.
- Mix the flour and salt together.
- Add the yeast mixture to a big bowl and little by little add the flour to the bowl while mixing it with your hand. The texture will be sticky at this phase.
- Add a handful of flour to a wooden surface. Place the dough on top and start moving it around with your hands until it's not sticky and has absorbed the flour from the surface.
- Add a couple of tablespoons of olive oil to the bowl where you made the dough. Place the dough back inside and cover with cling film or a towel.
- Let it rest for an hour until double in size.
- Put a little bit of oil in your hands to prevent the dough from sticking. Place the dough on the wooden surface and remove any air pockets by moving it around and pressing with your hands.
- Form the dough into a long roll and cut it into 8 equal pieces. Remember to oil your hands and the surface if the dough is getting too sticky.
- Place a non-stick pan over medium heat.
- Take one of the dough pieces and form it into a ball by rolling it on the surface. Using your fingers form it into a flat round pita bread.
- Place the pita bread on the heated pan and let it cook for 1-2 minutes on each side. You can prick it with a fork if it starts forming any bubbles.
- Continue with the rest of the pita bread pieces.
Notes
The texture of the dough is very soft and playable so it's easy to flatten it with just using your fingers. If it starts getting sticky, put some oil in your hands and the wooden surface.
Storage
Keep them in an airtight container in the fridge for 2-3 days. They are also freezable after they cool down. Just defrost them and warm them up on a heated pan for a minute or two.
Nutrition Info (per serving)
I am not a nutritionist. The nutrition information has been calculated using an on-line calculator, and is intended for information and guidance purposes only. If the nutrition information is important to you, you should consider calculating it yourself, using your preferred tool.


Julia - Mamazilla
If you tried my pita bread recipe and love how easy it is to make them, leave me a comment and a rating here.
Nici Kobrowski
The best recipe ever!
Mamazilla - Julia
Thank you so much :-)